Yoga is a centuries-old practice that offers numerous physical, mental, and spiritual benefits for people of all ages.
However, traditional yoga poses can sometimes be challenging or even impossible for seniors due to limited mobility or health issues. That’s where chair yoga comes in.
Chair yoga is a gentle, adaptable form of yoga that can be practiced while sitting on a chair, making it accessible for seniors who may have difficulty with standing or balance.
This comprehensive guide will teach seniors how to practice chair yoga safely and effectively, with step-by-step instructions and expert advice on various poses, sequences, and resources.
Benefits of Chair Yoga Exercise for Seniors
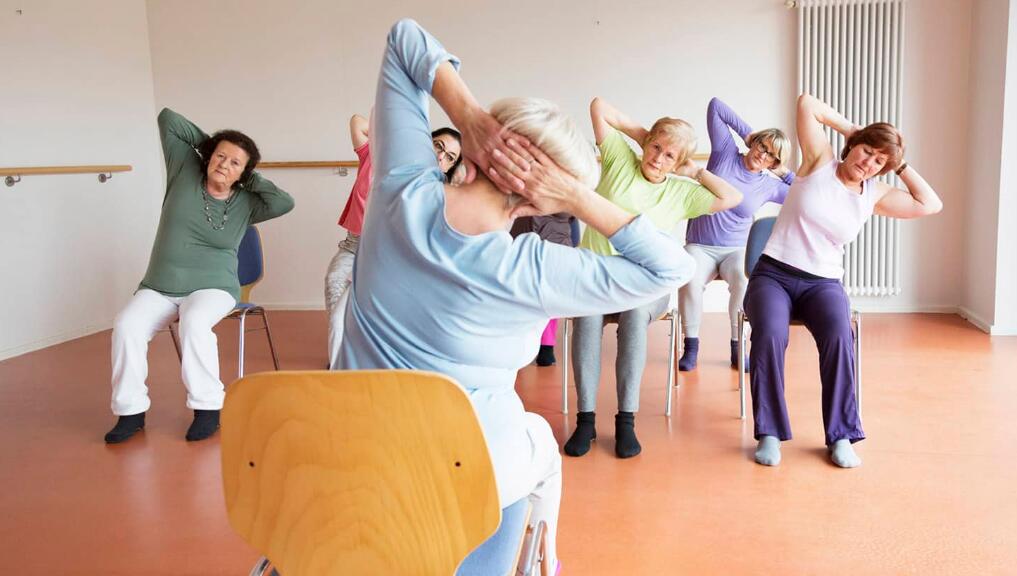
– Improved flexibility: Chair yoga helps to gently stretch and lengthen muscles, increasing overall flexibility and range of motion.
– Enhanced balance: Practicing chair yoga poses can improve balance and stability, reducing the risk of falls in seniors.
– Increased strength: Chair yoga incorporates resistance and weight-bearing exercises that help build muscle strength, especially in the core, legs, and upper body.
– Reduced joint pain: Gentle, low-impact movements in chair yoga can help alleviate joint pain and stiffness, particularly in the hips, knees, and shoulders.
– Better posture: Chair yoga encourages proper alignment and body awareness, improving posture and reducing back and neck pain.
– Stress relief: The mindful breathing and movement in chair yoga can help to calm the mind and reduce stress levels.
– Enhanced mental clarity: Regular chair yoga practice can improve focus, concentration, and memory, contributing to better cognitive function in seniors.
– Lower blood pressure: Chair yoga’s calming and stress-reducing effects can contribute to lower blood pressure, benefiting heart health.
– Improved digestion: The gentle movements and twists in chair yoga can help stimulate digestion and alleviate constipation.
– Better sleep: Chair yoga can help relax the body and mind, improving sleep quality and duration.
Increased self-confidence: Regular chair yoga practice can boost self-esteem and confidence as seniors see improvements in their physical abilities and overall well-being.
Who can do Chair Yoga, and Who Should Be Cautious
Chair yoga is suitable for a wide range of individuals, making it an ideal exercise for seniors with limited mobility, chronic pain, or health conditions such as arthritis or osteoporosis.
It can help improve flexibility, strength, balance, and overall well-being, all while reducing stress and the risk of injury.
However, some seniors should be cautious before starting a chair yoga practice. Those with severe joint pain, recent surgeries, or other serious health conditions should consult with a doctor before beginning any new exercise routine, including chair yoga.
A healthcare professional can provide personalized advice on which poses or movements may be safe and beneficial, and which should be avoided.
Preparing for Chair Yoga: Choosing the Right Chair and Setting Up a Safe Environment
Before starting a chair yoga practice, it’s essential to consult with a doctor to ensure that it’s a safe and suitable form of exercise. Once a doctor approves, the next step is to choose the right chair.
Choosing the Right Chair for Chair Yoga
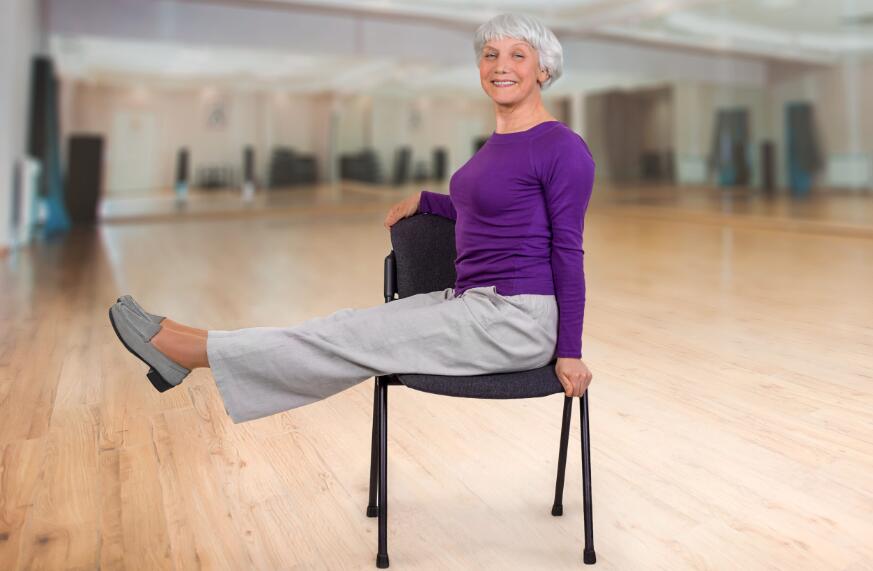
The chair you choose for chair yoga plays a crucial role in ensuring the safety and effectiveness of your practice. Here are some specific guidelines to help you choose the right chair:
- Stability: Select a chair that is sturdy and stable, without any wobbling or risk of tipping over. Test the chair by sitting on it and shifting your weight from side to side to check its stability.
- Chair material: A chair made of solid materials, such as wood or metal, is preferable over a plastic chair, as it provides better support and stability.
- Armless design: An armless chair or one with removable arms is ideal for chair yoga, as it allows for a greater range of motion during the practice. Armrests may restrict your movement or make it difficult to perform certain poses.
- Straight back: Choose a chair with a straight back that allows you to maintain proper posture during your practice. Chairs with overly cushioned or reclined backs may not provide the necessary support for your spine.
- Seat height: The chair’s seat height should allow you to place your feet flat on the ground with your knees bent at a 90-degree angle. If the chair is too high, you can use a folded blanket or yoga block under your feet to achieve the right height.
- Non-slip surface: Make sure the chair’s seat is not slippery. If the seat is made of slippery material, place a yoga mat, towel, or non-slip pad on the seat for added grip and stability.
Setting Up a Safe and Comfortable Environment for Chair Yoga
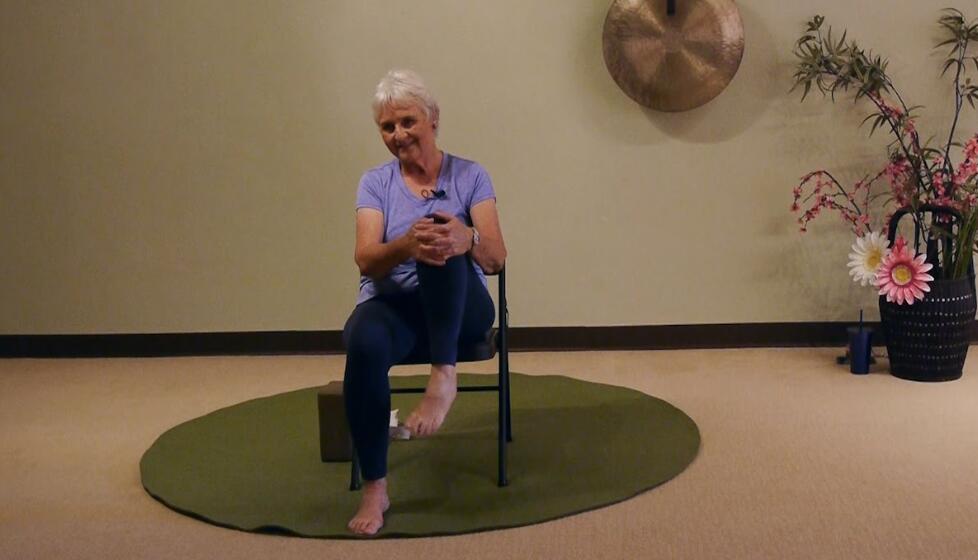
Creating a safe and comfortable space for your chair yoga practice ensures that you can focus on the poses and movements without distractions or unnecessary risks.
Here are some tips for setting up your chair yoga environment:
- Choose a quiet, well-lit space: Find a calm, peaceful area in your home with ample lighting to help you see and perform the poses clearly. Avoid practicing in noisy or cluttered spaces that may cause distractions or accidents.
- Clear the area: Make enough room around your chair to stretch your arms and legs without hitting any furniture or objects. Remove any potential hazards, such as rugs or cords that could cause you to trip or slip.
- Non-slip surface: Place your chair on a non-slip surface, such as a yoga mat or a carpet with a non-slip pad underneath, to prevent the chair from sliding during your practice.
- Use props: Gather any props you may need for your practice, such as a yoga strap, folded blanket, or additional cushions. These can help support, alignment, and comfort during your chair yoga practice.
- Set the mood: Create a relaxing atmosphere by playing soft music, using calming essential oils, or adjusting the room temperature to a comfortable level.
- Keep water and a towel nearby: Stay hydrated by keeping a bottle of water close during your practice. A towel can also help wipe away sweat or provide additional padding.
By following these guidelines for choosing the right chair and setting up a safe and comfortable environment, you can fully enjoy the benefits of chair yoga while minimizing the risk of injury or discomfort.
8 Basic and Safe Chair Yoga Poses for Seniors
Here are 8 easy chair yoga pose to practice:
1. Seated Mountain Pose (Tadasana)
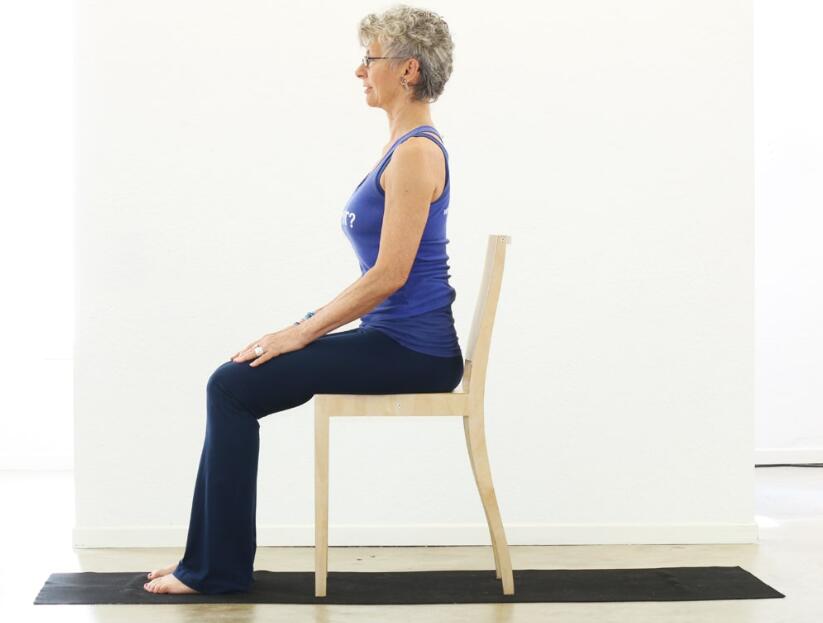
Step-by-step instructions:
- Sit on the chair with your feet flat on the floor, hip-width apart.
- Lengthen your spine and sit tall, with your shoulders relaxed and down.
- Place your hands on your thighs, palms facing down.
- Inhale deeply, and as you exhale, draw your belly button towards your spine, engaging your core muscles.
- Hold this pose for 5-10 breaths, focusing on maintaining a tall, strong posture.
Benefits: This pose helps improve posture, strengthens the core, and promotes mental clarity.
Modifications: If sitting tall is challenging, place a folded blanket or cushion behind your lower back for additional support.
2. Seated Forward Fold (Paschimottanasana)
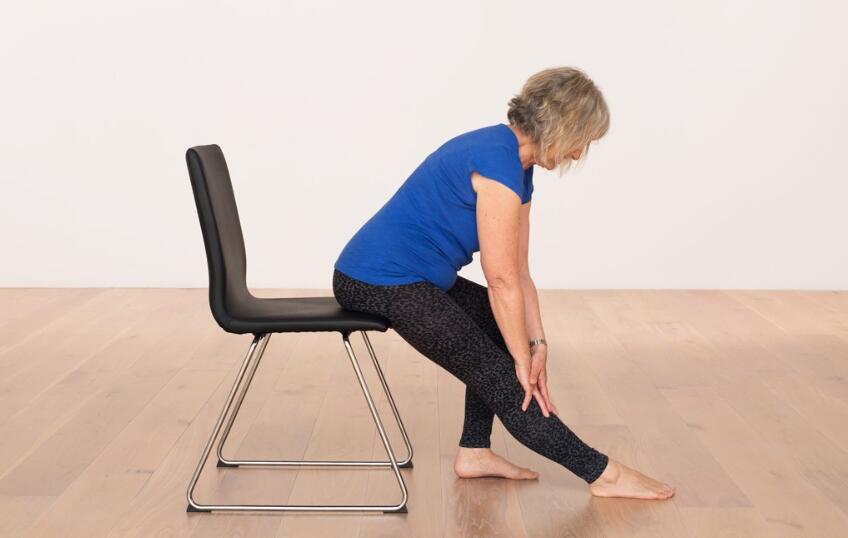
Step-by-step instructions:
- Sit on the edge of the chair with your feet hip-width apart.
- Inhale and lengthen your spine, lifting your arms overhead.
- Exhale and slowly fold forward, reaching your hands towards your toes or ankles.
- Keep your spine long and allow your head to hang heavy.
- Hold this pose for 5-10 breaths, feeling a gentle stretch in your hamstrings and lower back.
Benefits: This pose stretches the hamstrings, lower back, and spine, promoting relaxation and stress relief.
Modifications: If reaching for the toes or ankles is challenging, use a yoga strap or belt to loop around your feet, holding onto the strap for support.
3. Seated Cat-Cow Stretch (Marjaryasana/Bitilasana)
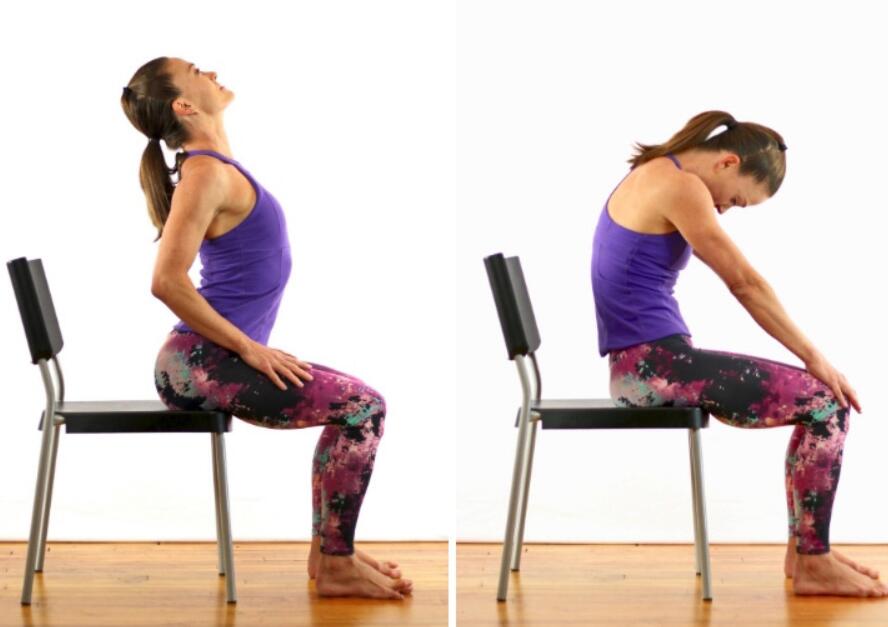
Step-by-step instructions:
- Sit on the chair with your feet flat on the floor and your hands on your knees.
- Inhale and arch your back, lifting your chest and gaze upward for Cow pose.
- Exhale and round your spine, tucking your chin towards your chest for Cat pose.
- Continue alternating between Cat and Cow poses for 5-10 breaths, syncing your movement with your breath.
Benefits: This pose improves spinal flexibility, relieves tension in the neck and shoulders, and massages the abdominal organs.
Modifications: If placing the hands on the knees causes discomfort, rest the hands on the thighs instead.
4. Seated Side Stretch (Parsva Sukhasana)
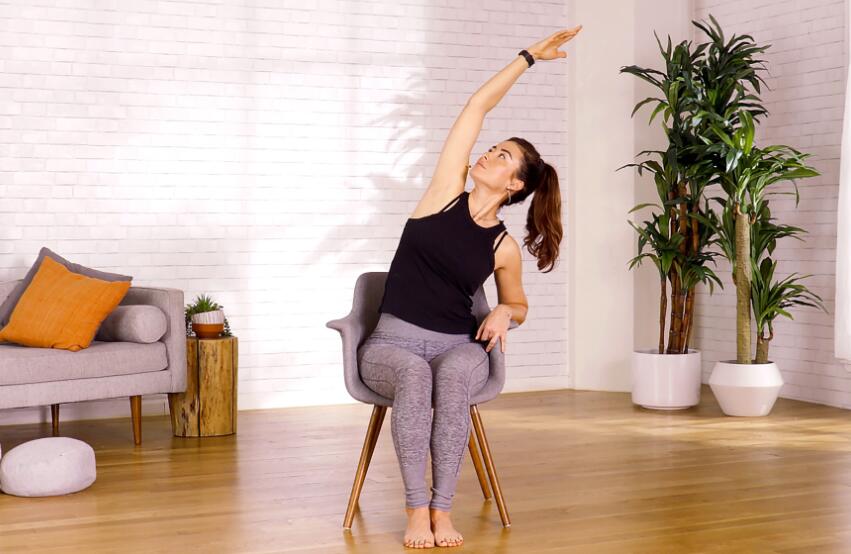
Step-by-step instructions:
- Sit on the chair with your feet flat on the floor, hip-width apart.
- Inhale and raise your left arm overhead.
- Exhale and gently bend your torso to the right, feeling a stretch along your left side.
- Hold for 3-5 breaths, then return to the starting position.
- Repeat on the other side.
Benefits: This pose stretches the side body, improves flexibility, and can help alleviate tightness in the ribcage and intercostal muscles.
Modifications: If raising the arm overhead is challenging, place the hand on the hip or hold onto the chair’s backrest for support.
5. Seated Twist (Ardha Matsyendrasana)
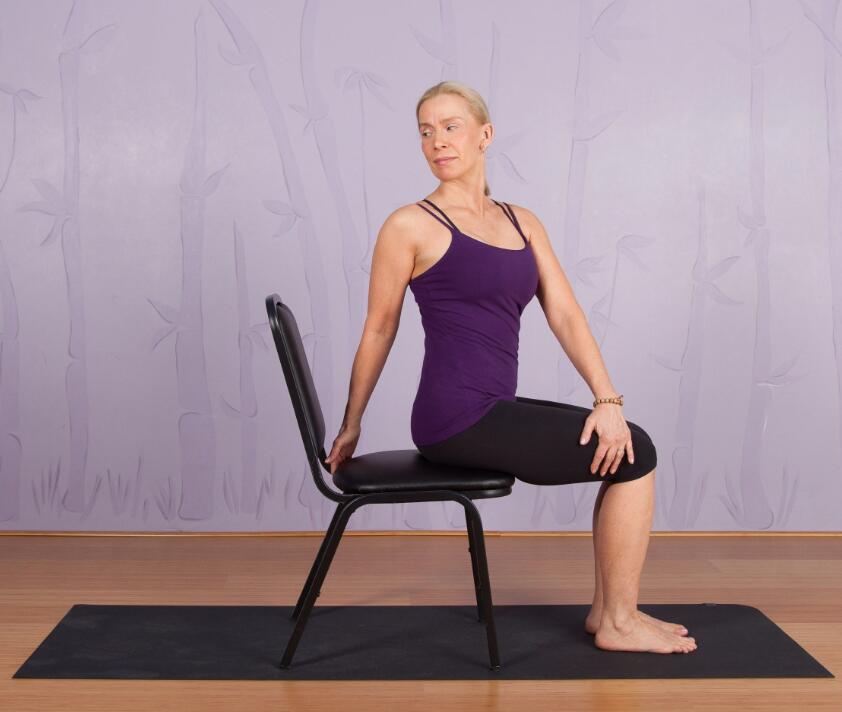
Step-by-step instructions:
- Sit on the chair with your feet flat on the floor, hip-width apart.
- Inhale and lengthen your spine, sitting tall.
- Exhale and gently twist your torso to the right, placing your left hand on your right thigh and your right hand on the chair’s backrest.
- Hold for 3-5 breaths, then return to the starting position.
- Repeat on the other side.
Benefits: This pose improves spinal flexibility, aids digestion, and can help alleviate lower back pain.
Modifications: If the twist is too intense, place both hands on the thighs and gently twist without using the chair’s backrest for support.
6. Seated Tree Pose (Vrksasana)
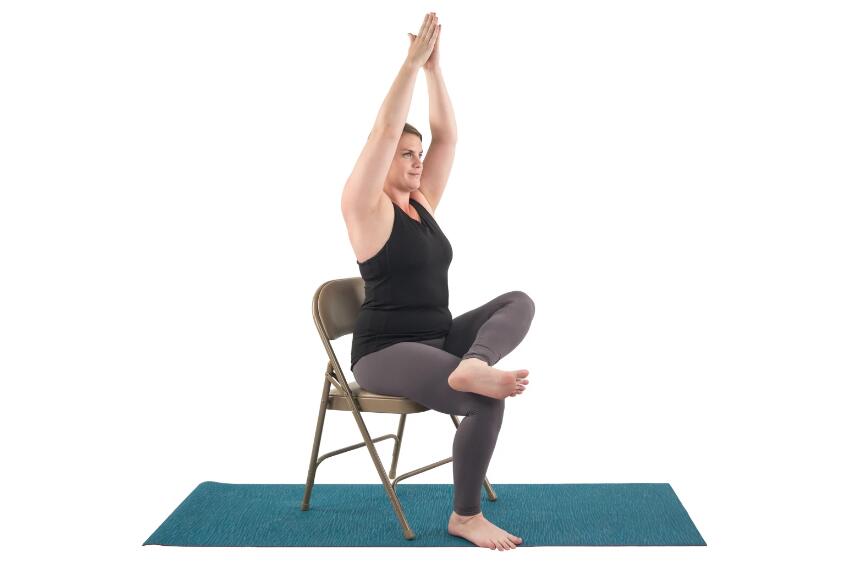
Step-by-step instructions:
- Sit on the chair with your feet flat on the floor, hip-width apart.
- Place your right ankle on your left thigh, just above the knee, with the right knee pointing out to the side.
- Rest your hands on your right ankle and left knee.
- Hold for 5-10 breaths, then switch sides.
Benefits: This pose stretches the hips, thighs, and groin while improving balance and concentration.
Modifications: If placing the ankle on the thigh is challenging, place the right foot on the left calf or use a yoga block under the right knee for support.
7. Seated Warrior II (Virabhadrasana II)
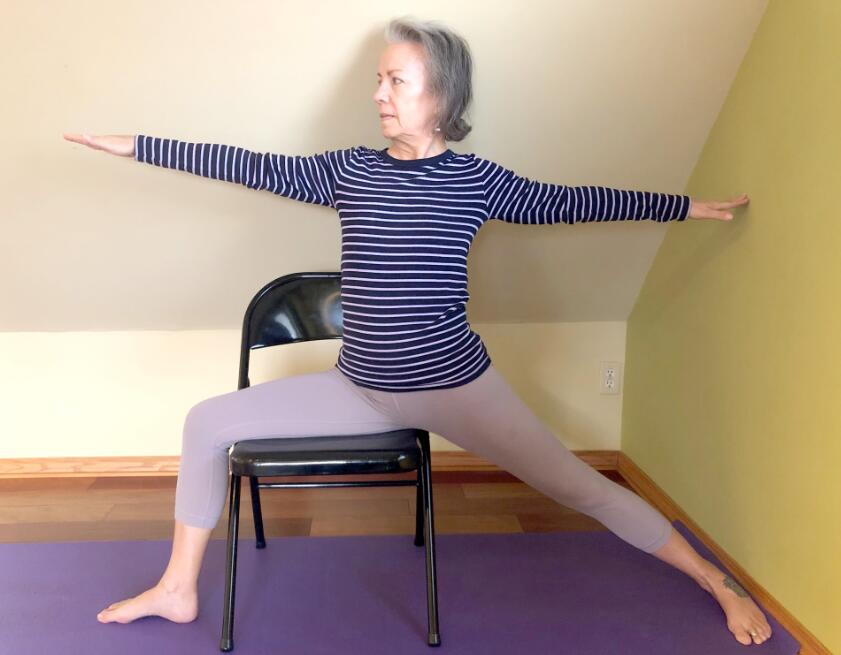
Step-by-step instructions:
- Sit on the edge of the chair, facing to the right with your right leg bent at a 90-degree angle and your left leg extended straight behind you.
- Align your right heel with the arch of your left foot.
- Raise your arms to shoulder height, parallel to the floor, with your palms facing down.
- Gaze over your right fingertips and hold for 5-10 breaths.
- Repeat on the other side.
Benefits: This pose strengthens the legs, hips, and core while improving balance and concentration.
Modifications: If raising the arms is challenging, rest the hands on the hips or the chair seat for support.
8. Seated Leg Lift (Uttanpadasana)

Step-by-step instructions:
- Sit on the chair with your feet flat on the floor, hip-width apart.
- Hold onto the sides of the chair for support.
- Inhale and lift your right leg, keeping it straight and pointing your toes.
- Hold for 3-5 breaths, then lower your leg and switch sides.
Benefits: This pose strengthens the hip flexors, quadriceps, and core muscles while improving balance and coordination.
Modifications: If lifting the leg straight is challenging, bend the knee and lift the thigh towards the chest.
Cautions Before and After Doing Chair Yoga

Chair yoga is a gentle and accessible exercise that can benefit individuals of all ages and abilities. However, it is essential to be aware of certain precautions before starting a chair yoga practice and after completing a session. Taking the necessary precautions can reduce the risk of injury and enjoy a safe and effective practice.
Before starting chair yoga:
- Consult your doctor: If you have any pre-existing medical conditions, injuries, or concerns, consult your healthcare provider before beginning a chair yoga practice. They can help determine if chair yoga is appropriate for you and provide guidance on modifications or poses to avoid.
- Choose the right chair: As previously mentioned, selecting a sturdy chair with a straight back and no armrests is essential for chair yoga. Ensure the chair is stable and does not wobble to prevent falls or injuries during your practice.
- Warm-up: Before starting any exercise, including chair yoga, it is crucial to warm up your muscles and joints to prevent strain or injury. Spend a few minutes performing gentle movements, such as shoulder rolls, neck stretches, and ankle circles, to prepare your body for your practice.
- Be mindful of your limitations: Recognize your body’s limits and avoid pushing yourself too far in any pose. Listen to your body and adjust the poses as needed to accommodate your comfort and ability level.
- Use modifications and props: Do not hesitate to modify poses or use props, such as a yoga strap, folded blanket, or blocks, to ensure proper alignment and support during your practice.
After completing chair yoga:
- Cool down: Gradually bring your body back to a state of rest by performing gentle stretches and deep, slow breathing exercises. Cooling down helps to prevent muscle soreness and stiffness after your practice.
- Hydrate: Drink plenty of water after your chair yoga session to replenish fluids lost during your practice and to help flush out toxins.
- Listen to your body: After completing your session, pay attention to any areas of discomfort or pain. If you experience persistent discomfort, consult your healthcare provider to discuss potential causes and solutions.
- Reflect on your practice: Take a moment to reflect on your chair yoga session, noting how you feel physically, mentally, and emotionally. This self-awareness can help you assess your progress identify areas where you may need to adjust or modify your practice.
- Maintain consistency: Aim to practice consistently to reap the full benefits of chair yoga. Establish a routine that suits your lifestyle and commit to practicing regularly, whether it be daily or several times per week.
By taking these precautions before and after your chair yoga sessions, you can enjoy a safe and effective.
Chair Yoga Resources to Learn From
For seniors interested in learning more about chair yoga, there are numerous resources available, including:
- Books, such as “Chair Yoga: Sit, Stretch, and Strengthen Your Way to a Happier, Healthier You” by Kristin McGee (Buy on Amazon)
- Online videos and tutorials, like those offered by Yoga with Adriene or Yoga for Seniors. (Watch the youtube video)
- Local chair yoga classes or workshops at senior centers, community centers, or yoga studios.
By regularly practicing chair yoga, seniors can experience the full range of benefits this gentle, adaptable form of exercise offers.
Conclusion
Chair yoga offers a safe, accessible way for seniors to enjoy the numerous benefits of yoga, regardless of their physical abilities or health concerns.
With step-by-step instructions, expert advice, and various poses and sequences, seniors can confidently start their chair yoga journey and discover how it can improve their overall well-being.
So, grab a chair, take a deep breath, and try chair yoga—you might be surprised at how much it can enhance your life.
