
Building an outdoor yoga platform is a great way to enjoy the benefits of yoga while surrounded by nature. It can also be a great addition to your home if you entertain often or have a large family. If you’re thinking about building an outdoor yoga platform, there are a few things you need to keep in mind.
Keep reading to find the guide!
What Is a Yoga Platform?
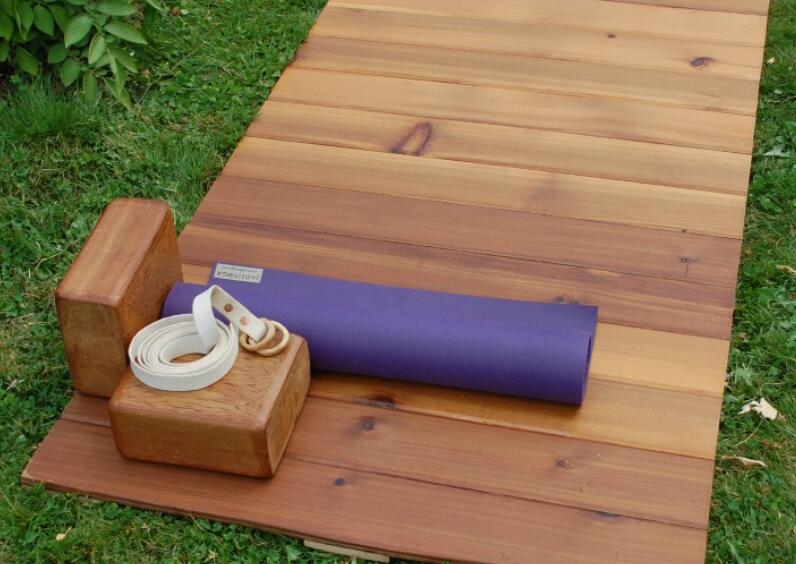
A yoga platform or yoga deck is a beautiful piece of wood that can be fitted on the patio, in a garden, or in your house’s backyard. The best part about having this is you don’t have to replace your new yoga mat every few years.
It is made with high-quality material, which means it will withstand moisture and won’t rot like other mats. In addition, the mat is easy to clean and comes with a carrying case, making it perfect for traveling.
So, if you are looking for a durable and stylish yoga mat, then a yoga platform is the way to go.
The Best Material To Build An Outdoor Yoga Platform
An outdoor yoga platform can be made from a variety of materials, but the best material will depend on the specific needs of the yogi.
For example, a material like concrete or brick would be a good choice if you are looking for a platform that is easy to clean and maintain.
On the other hand, if you are looking for a more natural and eco-friendly platform, then a material like bamboo would be a better choice.
Ultimately, the best material for an outdoor yoga platform is the one that best meets your needs.
How Much Does It Cost to Build an Outdoor Yoga Platform?

If you’re planning on building an outdoor yoga platform, the first thing you’ll need to consider is the project’s average cost.
Depending on the size and materials you choose, the average cost of a deck can range from a few hundred dollars to several thousand.
Here is a rough estimate of the cost of materials you will need to get started.
In order to build a basic yoga platform, you will need the following materials:
- -4x4x8 pressure-treated lumber – approximately $9 per piece
- -2x4x8 pressure-treated lumber – approximately $5 per piece
- -1/2″ Plywood sheets – approximately $25 per sheet
- -1 1/4″ exterior screws – approximately $10 per box
- -Construction adhesive – approximately $5 per tube
- -Outdoor paint or stain – prices will vary
- -Yoga mat – prices will vary
Total cost for materials: Less than $100
*Note: This does not include the cost of tools which you may need to purchase or rent.
Now that you know the cost of materials, let’s talk about the cost of labor. If you are going to be building the platform yourself, then the cost of labor will just be your time.
However, if you are hiring someone to build the platform for you, then you will need to factor in the cost of their labor as well.
The average rate for a carpenter is $70 per hour, so if it takes them 10 hours to build the platform, then the cost of labor would be $700.
How to Build an Outdoor Yoga Platform?

Building an outdoor yoga platform is a great way to create your own personal space for yoga and meditation. Here are the materials you’ll need:
- -4 4x4s (pressure-treated lumber)
- -1 sheet of 3/4″ plywood
- -1 bag of concrete mix
- -1 bag of gravel
- -1 tube of construction adhesive
- -16d nails
- -Paint or stain (optional)
First, cut the 4x4s into eight 2-foot long pieces. Next, take the plywood sheet and cut it into four 2-foot square pieces using a saw. Once you have all of your pieces cut, it’s time to start building!
Start by nailing two of the 4x4s together using three 16d nails at each joint. Repeat this step until all four 4x4s are nailed together in pairs. Now take two of the plywood squares and attach them to two adjacent 4x4s using construction adhesive and nails. Repeat this step until all four plywood squares are attached.
At this point, your platform should look like a basic rectangular frame. The next step is to add some support for the plywood so that it doesn’t sag over time. To do this, take one of the remaining plywood squares and cut it into four equal pieces. Nail these smaller plywood pieces between each set of larger plywood squares as shown in the picture below.
Now that your platform has some extra support, it’s time to add the finishing touches! If desired, paint or stain your platform in any color or style you choose. Once dry, place your yoga mat on top and enjoy!
How Do You Make a Wooden Platform?
1. Plan the size, shape, and design of the platform and consider getting a detailed drawing of your idea。
2. Dig holes for posts, lay down the foundation of the deck and mark the location of footings. Dig below the frost line, or according to the local code of your area.
3. Add tubing forms in the holes to raise the deck at least 1-inch above ground level. Backfill the holes after tubing and try to hold the soil two-three times.
4. Pour the concrete in the tubing forms, then place a post anchor bolt in the middle of each footer that will give some time for the cement to dry. Set post bases over the anchor once the concrete has cured.
5. You can either add posts or beams on the post base. Use hardware nails or screws to attach either of them to the bottom.
6. Once you are done, check the alignment to be sure of the shape, which, in most cases, is square.
7. Now will be the time to work on the deck, which begins with attaching the rim joist to the posts to create the board’s perimeter. It is advisable to use galvanized lag bolts to secure the rim joist.
8. Continue attaching the joists to the beams before installing the board.
9. Install the board and continue the process until all panels are added. Ensure that the decking board is installed perpendicular to the joists and use 1/8-inch between each deck board. You can also ask an expert about this step if you have any doubts or concerns about it.
10 Use two fasteners per board to hold it down as you install it; drive them through each panel and into every center joist in order help keep everything aligned correctly as you go along.
11 Once all of your boards are in place, trim their ends using a circular saw set at a depth of 1 inch (approximately).
12 Next, use a router with a 120-grit sandpaper attachment (or something similar) to ease all of their rough edges until they’re more presentable.
How to Decide Platform Size for Yoga?
The standard size of a yoga mat is 68 inches long and 24 inches wide. However, a yoga platform can be of any shape and size. If you have the space, we recommend getting a yoga mat that’s at least 6 feet long and 3 feet wide. This will give you plenty of room to move around and practice your poses.
The main reason whyplatform size matters in yoga is because some of the positions require you to be close to the edges.
For example, in the plank position, your hands should be close to the edge of the platform so that you can safely support your body weight. If the platform is too small, your hands may slip off the edge and you could injure yourself.
Conclusion
That’s it! You now have your very own outdoor yoga platform that you can use anytime, anywhere. We hope you enjoyed this tutorial and that you find many hours of peace and relaxation on your new platform. Namaste!