
Yoga arm balance poses can be a great way to strengthen and tone your upper body. Not only are they incredibly effective, but they also look beautiful and graceful when done correctly.
Even if you’re not an experienced yogi, there are plenty of beginner-friendly arm balance poses that will help you build strength and confidence in your practice.
If you’re just starting out with yoga arm balances, it is important to focus on form first before attempting more advanced poses.
With some patience and dedication, even the most challenging arm balance poses can become achievable goals for beginners!
5 Essential Yoga Arm Balance Poses for Beginners
Here’s a quick guide on the five essential arm balances you should master as a beginner yogi.
Plank Pose
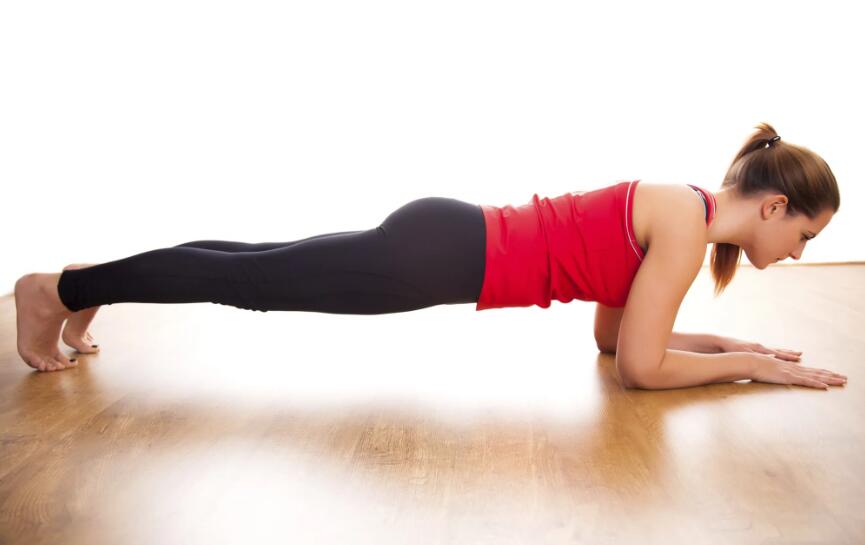
Plank pose is one of the most important yoga postures for building strength and stability in your upper body.
How to do it?
Start in a push-up position with your wrists below your shoulders, feet hip-width apart, toes tucked under, and legs straight.
Engage your core by drawing your navel toward your spine and press firmly into the ground with both hands and feet.
To make this pose more accessible, lower onto your knees instead of keeping them straight.
Downward Dog Pose
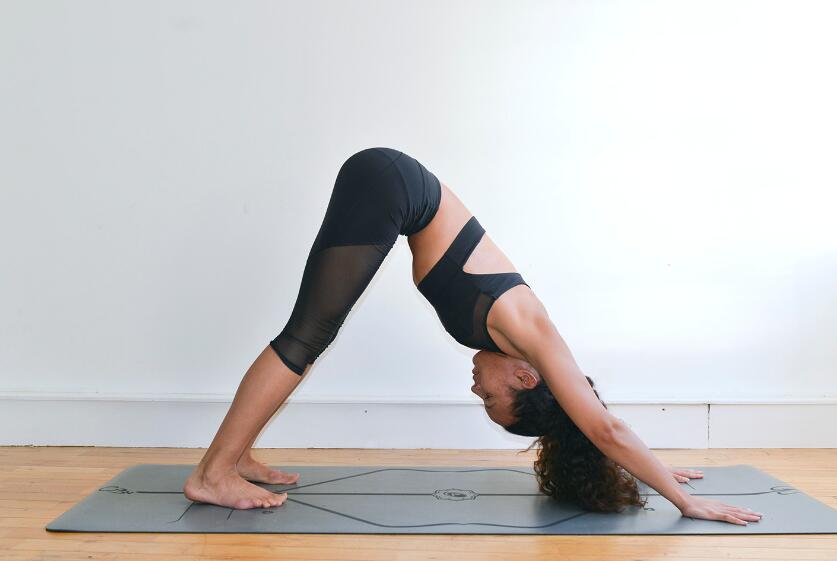
Downward dog is a great way to strengthen the arms while also stretching out tight hamstrings.
How to do it?
Start on all fours with hands shoulder-width apart and knees hip-width apart. Tuck your toes under and lift up into an upside-down “V” shape with arms straightened and heels pressing back towards the ground.
You can keep your knees bent if that feels better on your hamstrings or walk from side to side to increase flexibility in the hips.
Side Plank Pose
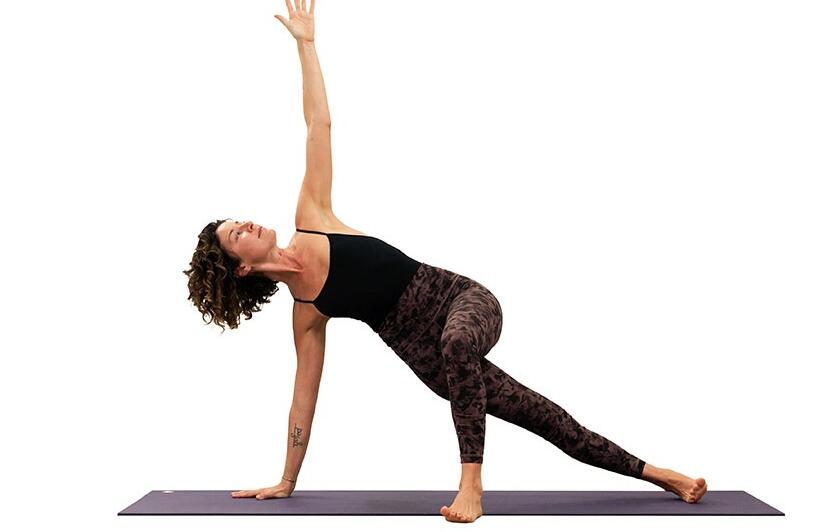
This pose is great for toning muscles in the arms and abdomen while also improving balance and posture alignment.
How to do it?
Begin by lying on one side with the bottom elbow bent directly beneath the shoulder joint and legs stacked on top of each other then lift yourself up off the ground supported by one forearm as you extend another arm towards the sky or keep it close to the chest (depending on what feels best).
Make sure that hips stay lifted so that the torso doesn’t collapse forward or rest too much weight onto the bottom elbow/wrist joint – this will help protect those areas from injury!
Wheel Pose
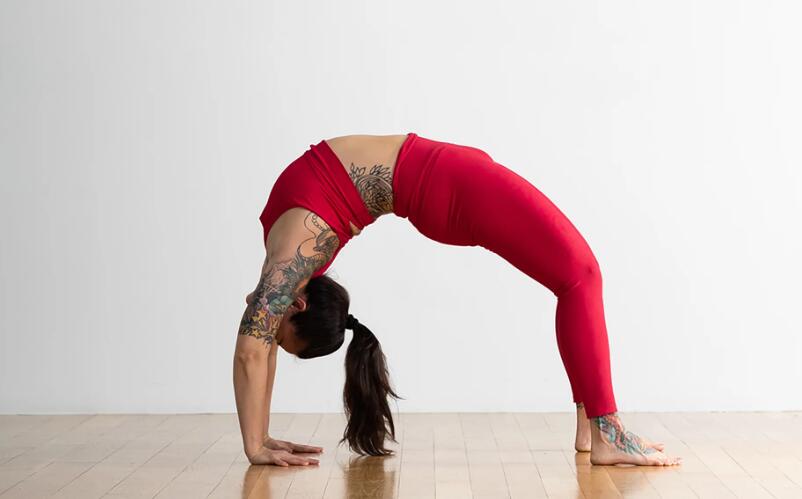
The wheel pose is an advanced arm balance where you support yourself using only your arms while lifting up into an arch shape with legs extended behind the head – it looks super impressive but doesn’t be intimidated!
How to do it?
Begin by lying flat on your back then bend your knees up towards your chest while simultaneously rolling your shoulders away from your ears before pressing palms flat against the floor next to your ears (fingers should be pointing towards shoulders).
Use core strength to slowly lift your torso off the ground until fully arched then hold for several breaths before lowering back down.
Repeat 3 times or more depending on the level of comfort/strength!
Wild Thing
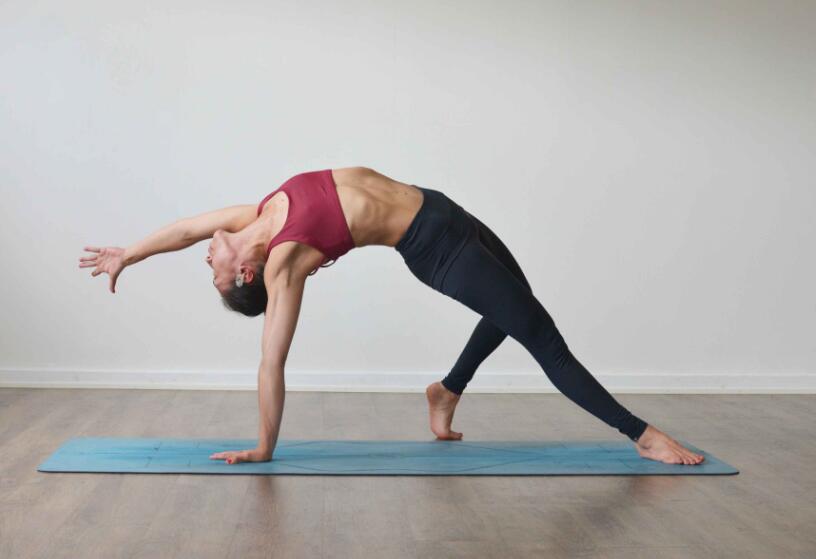
Wild thing is another fun yet challenging arm balance where you use both arms at once to lift up.
How to do it?
Start by coming into a downward-facing dog position then shift weight onto left hand as right-hand reaches back behind the body.
Use core strength plus momentum from shifting weight onto left hand/arm as you swing right leg forward between hands before pushing off from left hand/arm with enough force so that both feet end up together in the air.
Hold here for several breaths before releasing back down.
Repeat 3 times or more depending on the level of comfort/strength!
How to Use Props to Help Improve Your Yoga Arm Balances?
Props are a great way to support and protect your body as you practice arm balances, especially when it comes to protecting wrists from injury. Here’s how to use props for optimal safety and comfort:
– Blocks can be used under your hands in plank pose or downward dog to reduce strain off of the wrists.
– Straps can be used to wrap around your upper arms or between the hands if you’re having trouble keeping them engaged in poses like wild thing.
– Bolsters and blankets can be used for added support in wheel pose – just make sure that they are placed so that your lower back is properly supported before lifting off the ground.
Remember that props are there to help you practice safely and comfortably, so don’t be afraid to use them! By taking the time to properly set up your body with props before starting a pose, you can ensure that you feel supported and protected no matter what arm balance you’re practicing.
How the Right Breathing Technique Can Enhance Your Practice of Advanced Arm Balances?
The right breathing technique can help to make arm balances easier and more enjoyable. When you’re practicing an advanced pose, it can be helpful to focus on your breath as it helps to keep your body relaxed while also helping you to stay focused and centered.
Before starting a pose, take a few moments to inhale deeply through your nose and exhale out of your mouth. With each breath, think about letting go of any tension in the body so you can be as relaxed as possible during the pose.
As you’re practicing an arm balance, focus on breathing normally in and out of your nose while keeping your gaze focused inward. This will help you to stay calm, alert, and energized throughout the pose.
By incorporating mindful breathing into your practice, you’ll be able to enjoy each arm balance on a deeper level while also improving performance.
Conclusion
So there you have it – how to use props and the right breathing technique to help you get the most out of your yoga arm balance practice. By taking the time to properly set up and cultivate awareness of your breath, you can ensure that each pose is both enjoyable and beneficial. Enjoy!
Happy practicing!